To get exclusive patterns, projects, information, discounts on patterns, and livestream sessions with Margo, join our Patreon at patreon.com/margoanderson
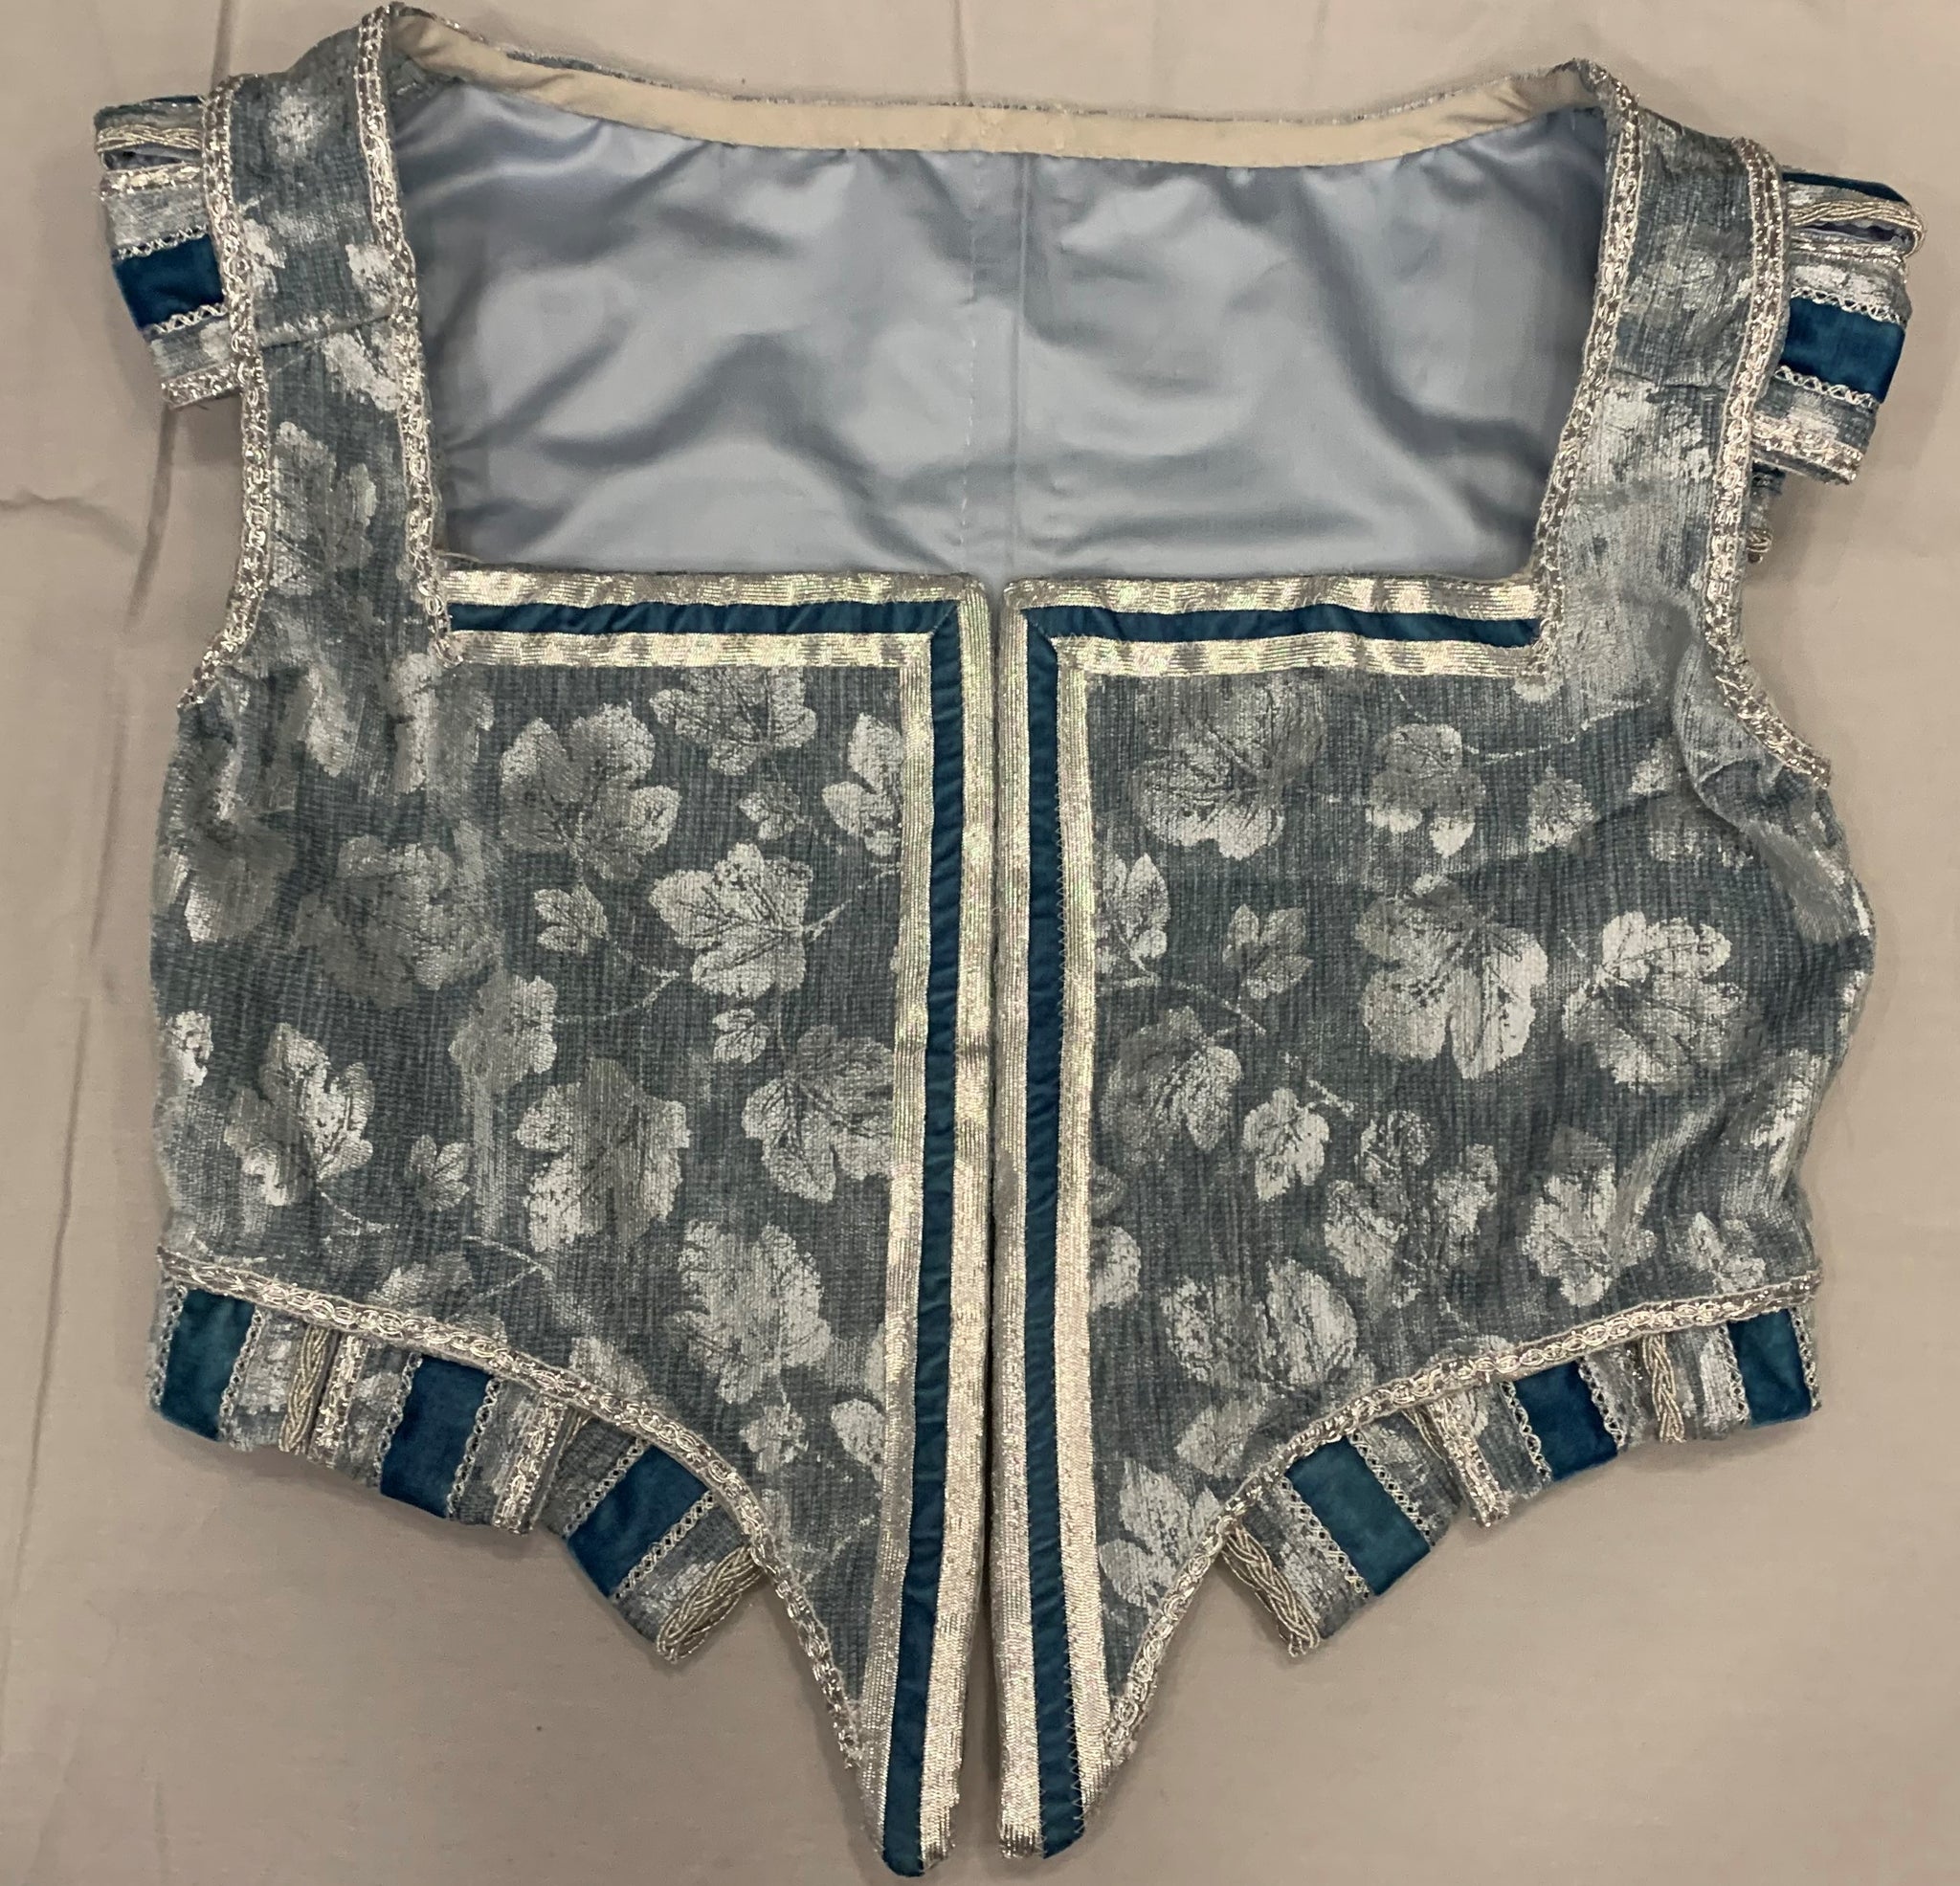
Welcome back to The Elizabethan Bodice Sew Along! Today we are going to discuss all the remaining things you need to do to finish your bodice! In our last installment, we finished our seams and bound the edges of our bodice. Bound bodice, waiting for finishing treatments. We had skipped the instructions on skirting, because we had planned on adding the skirting/tabs after the binding went on, in order to make it easier for adjusting for weight. However, we first had to choose trims for the bodice. Choosing the trims. We had some dark teal velvet we were planning on using for the underskirt, so we chose a dark teal ribbon for the main trim, and silver braids that coordinated. ...
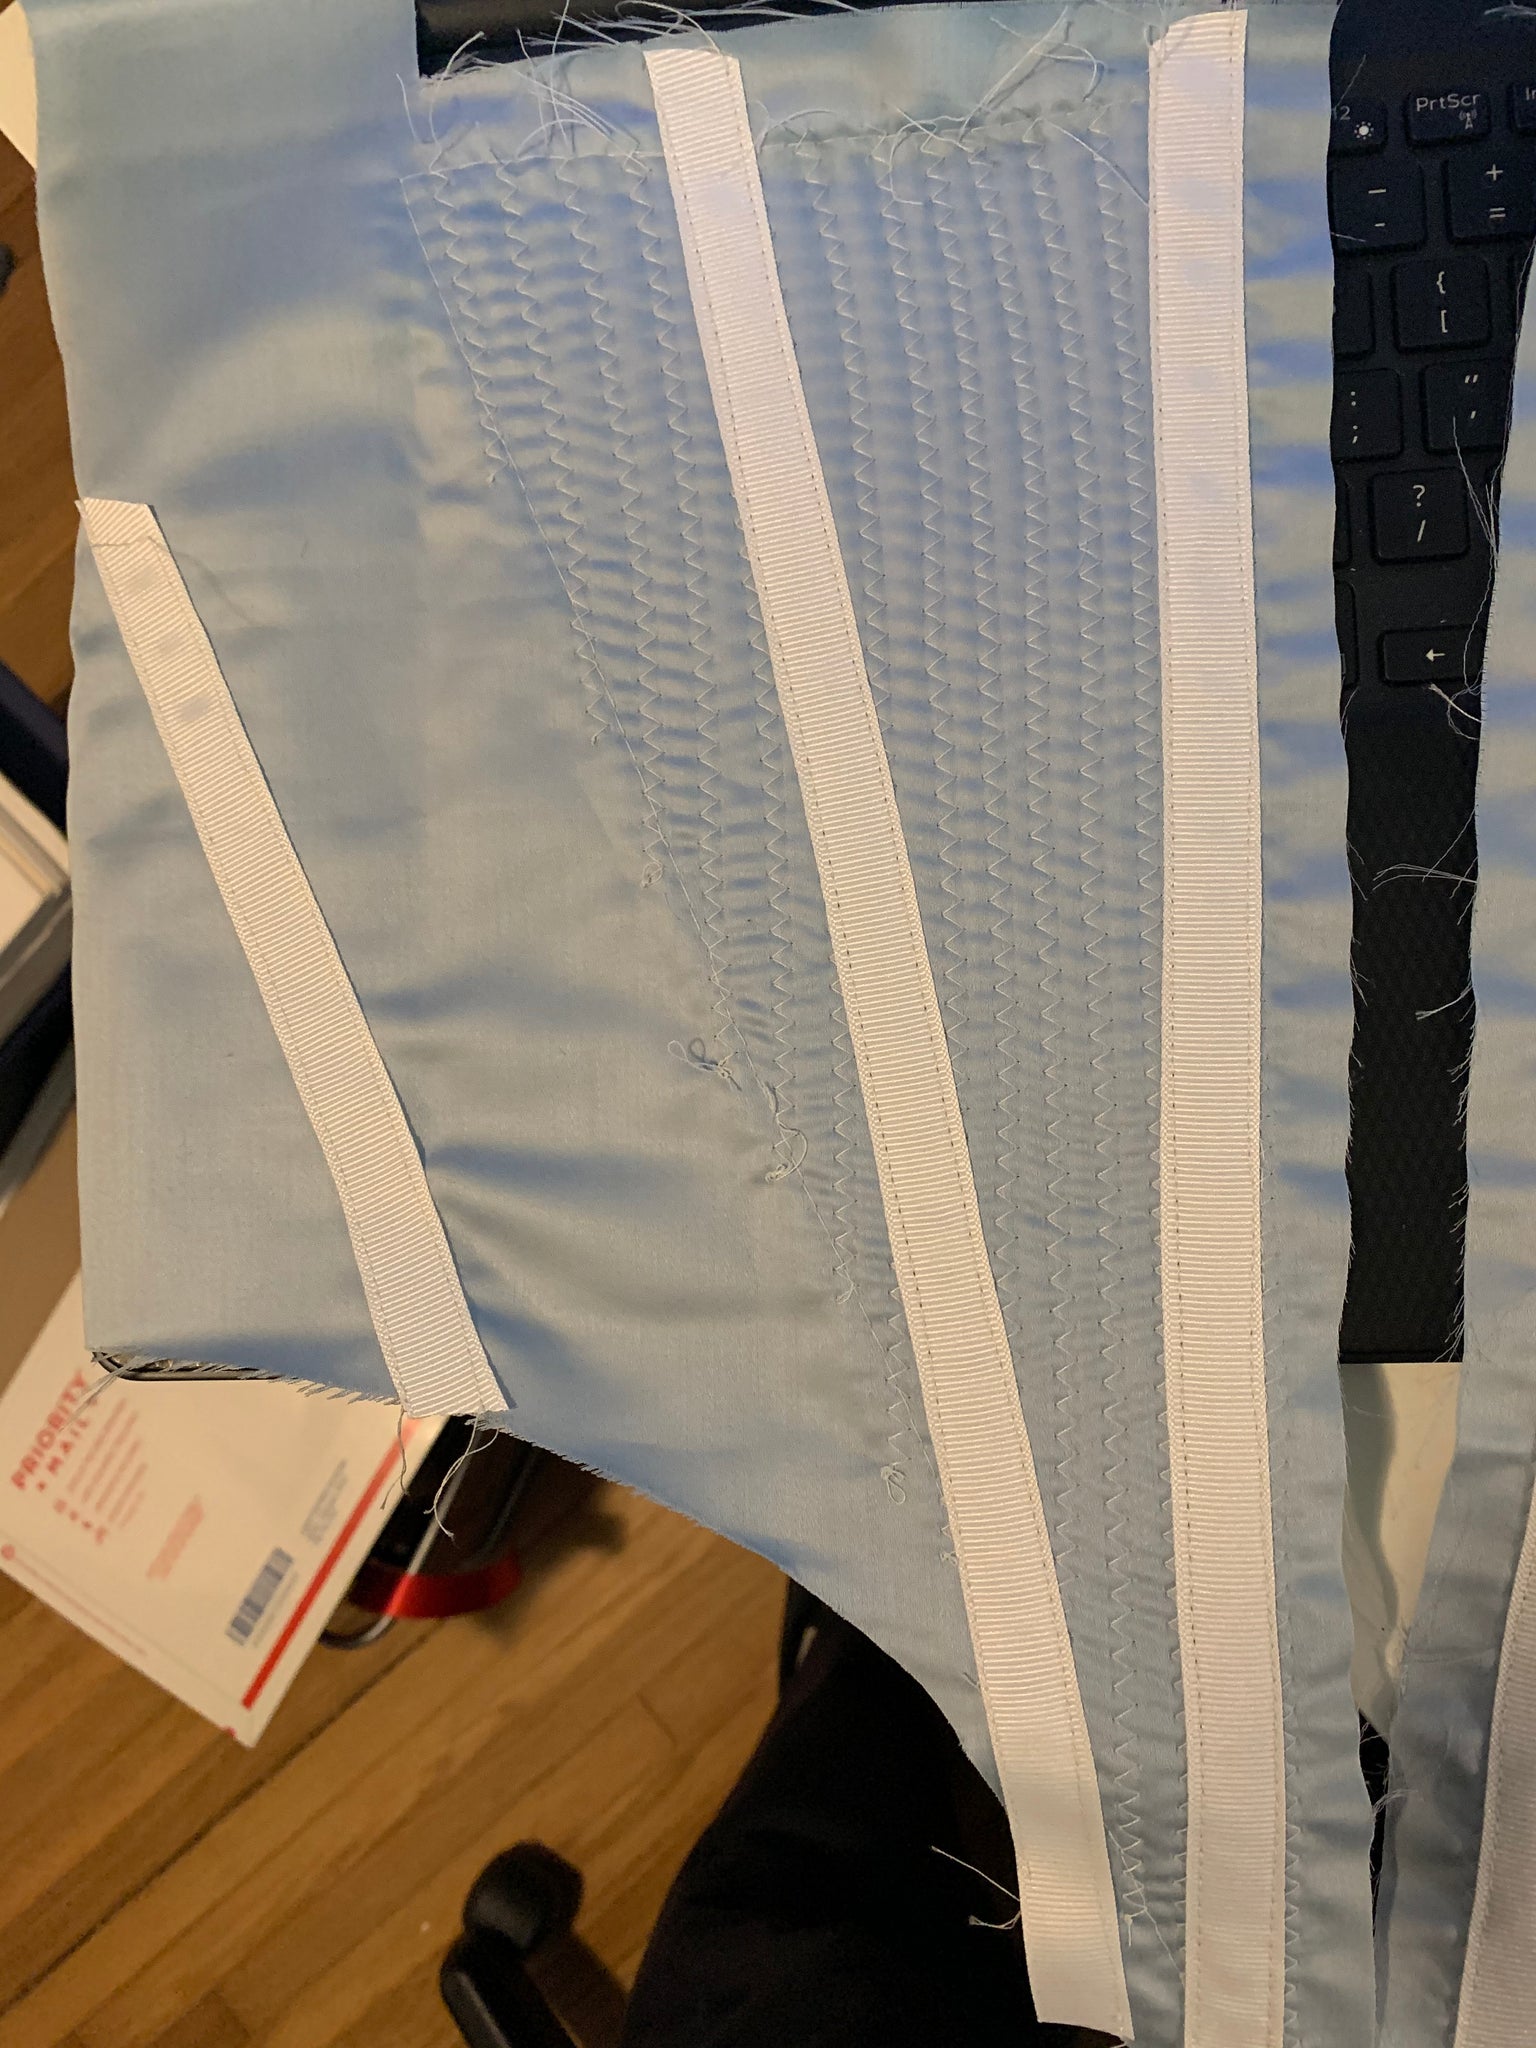
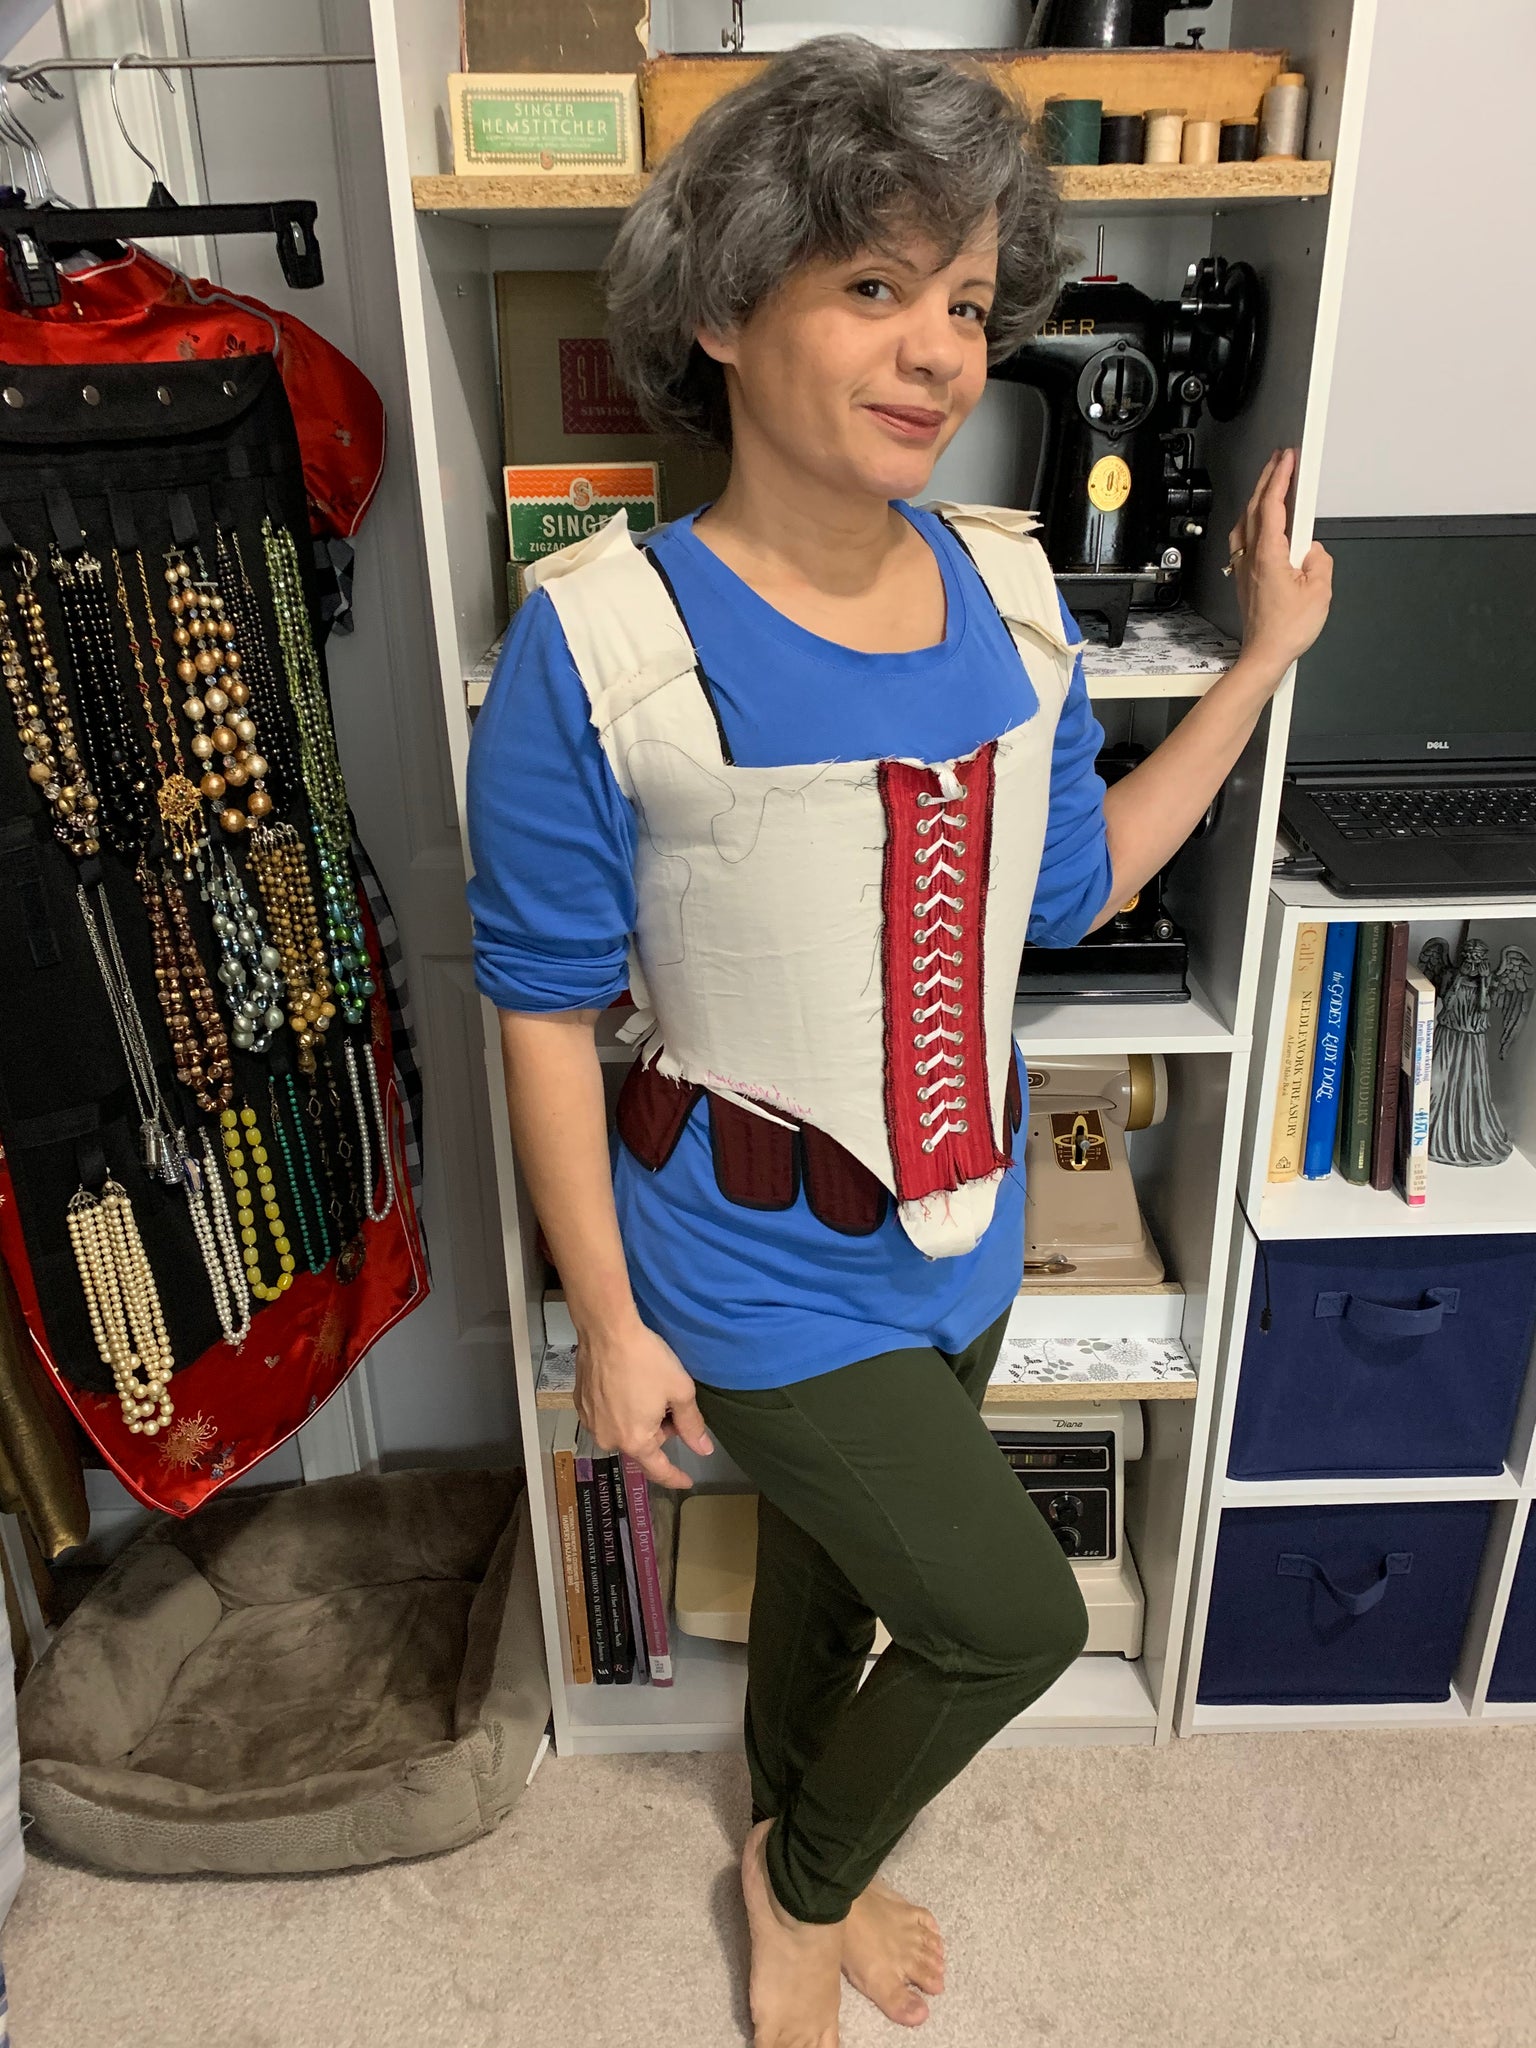
Welcome back to The Elizabethan Bodice Sew Along! Today we are going to focus on stacking our layers, and cinching our armsyce. In our last installment, we constructed our flatlining by adding stiffening and boning to it. Now we are going to take all those layers, and start turning them into something resembling a bodice. Our flatlining, ready to be stacked! We took our fashion fabric, and put it on the table RIGHT side down. Then we took our flatlining and put it WRONG sides together with it's coordinating fashion fabric piece. If we had interlining, we would have put this between those two layers. In this case, the side with the boning channels would be facing up, and the...
Welcome back to The Elizabethan Bodice Sew Along! Today we will be showing how to construct your flatlining, by adding in stiffening and boning. In our last blog post, we showed you how to properly cut out your flatlining and fashion fabric. The next thing you need to cut out is your stiffening. Cutting out your bodice stiffening pieces. The purpose of your bodice stiffening is to give additional support at the front of your garment. Bodice stiffening can be made from cotton batting, or (as we used here) wool felt. Because our bodice opens in the front, we cut four pieces of stiffening instead of two on the fold. Trimming the edges of the stiffening pieces, and doing a messy...
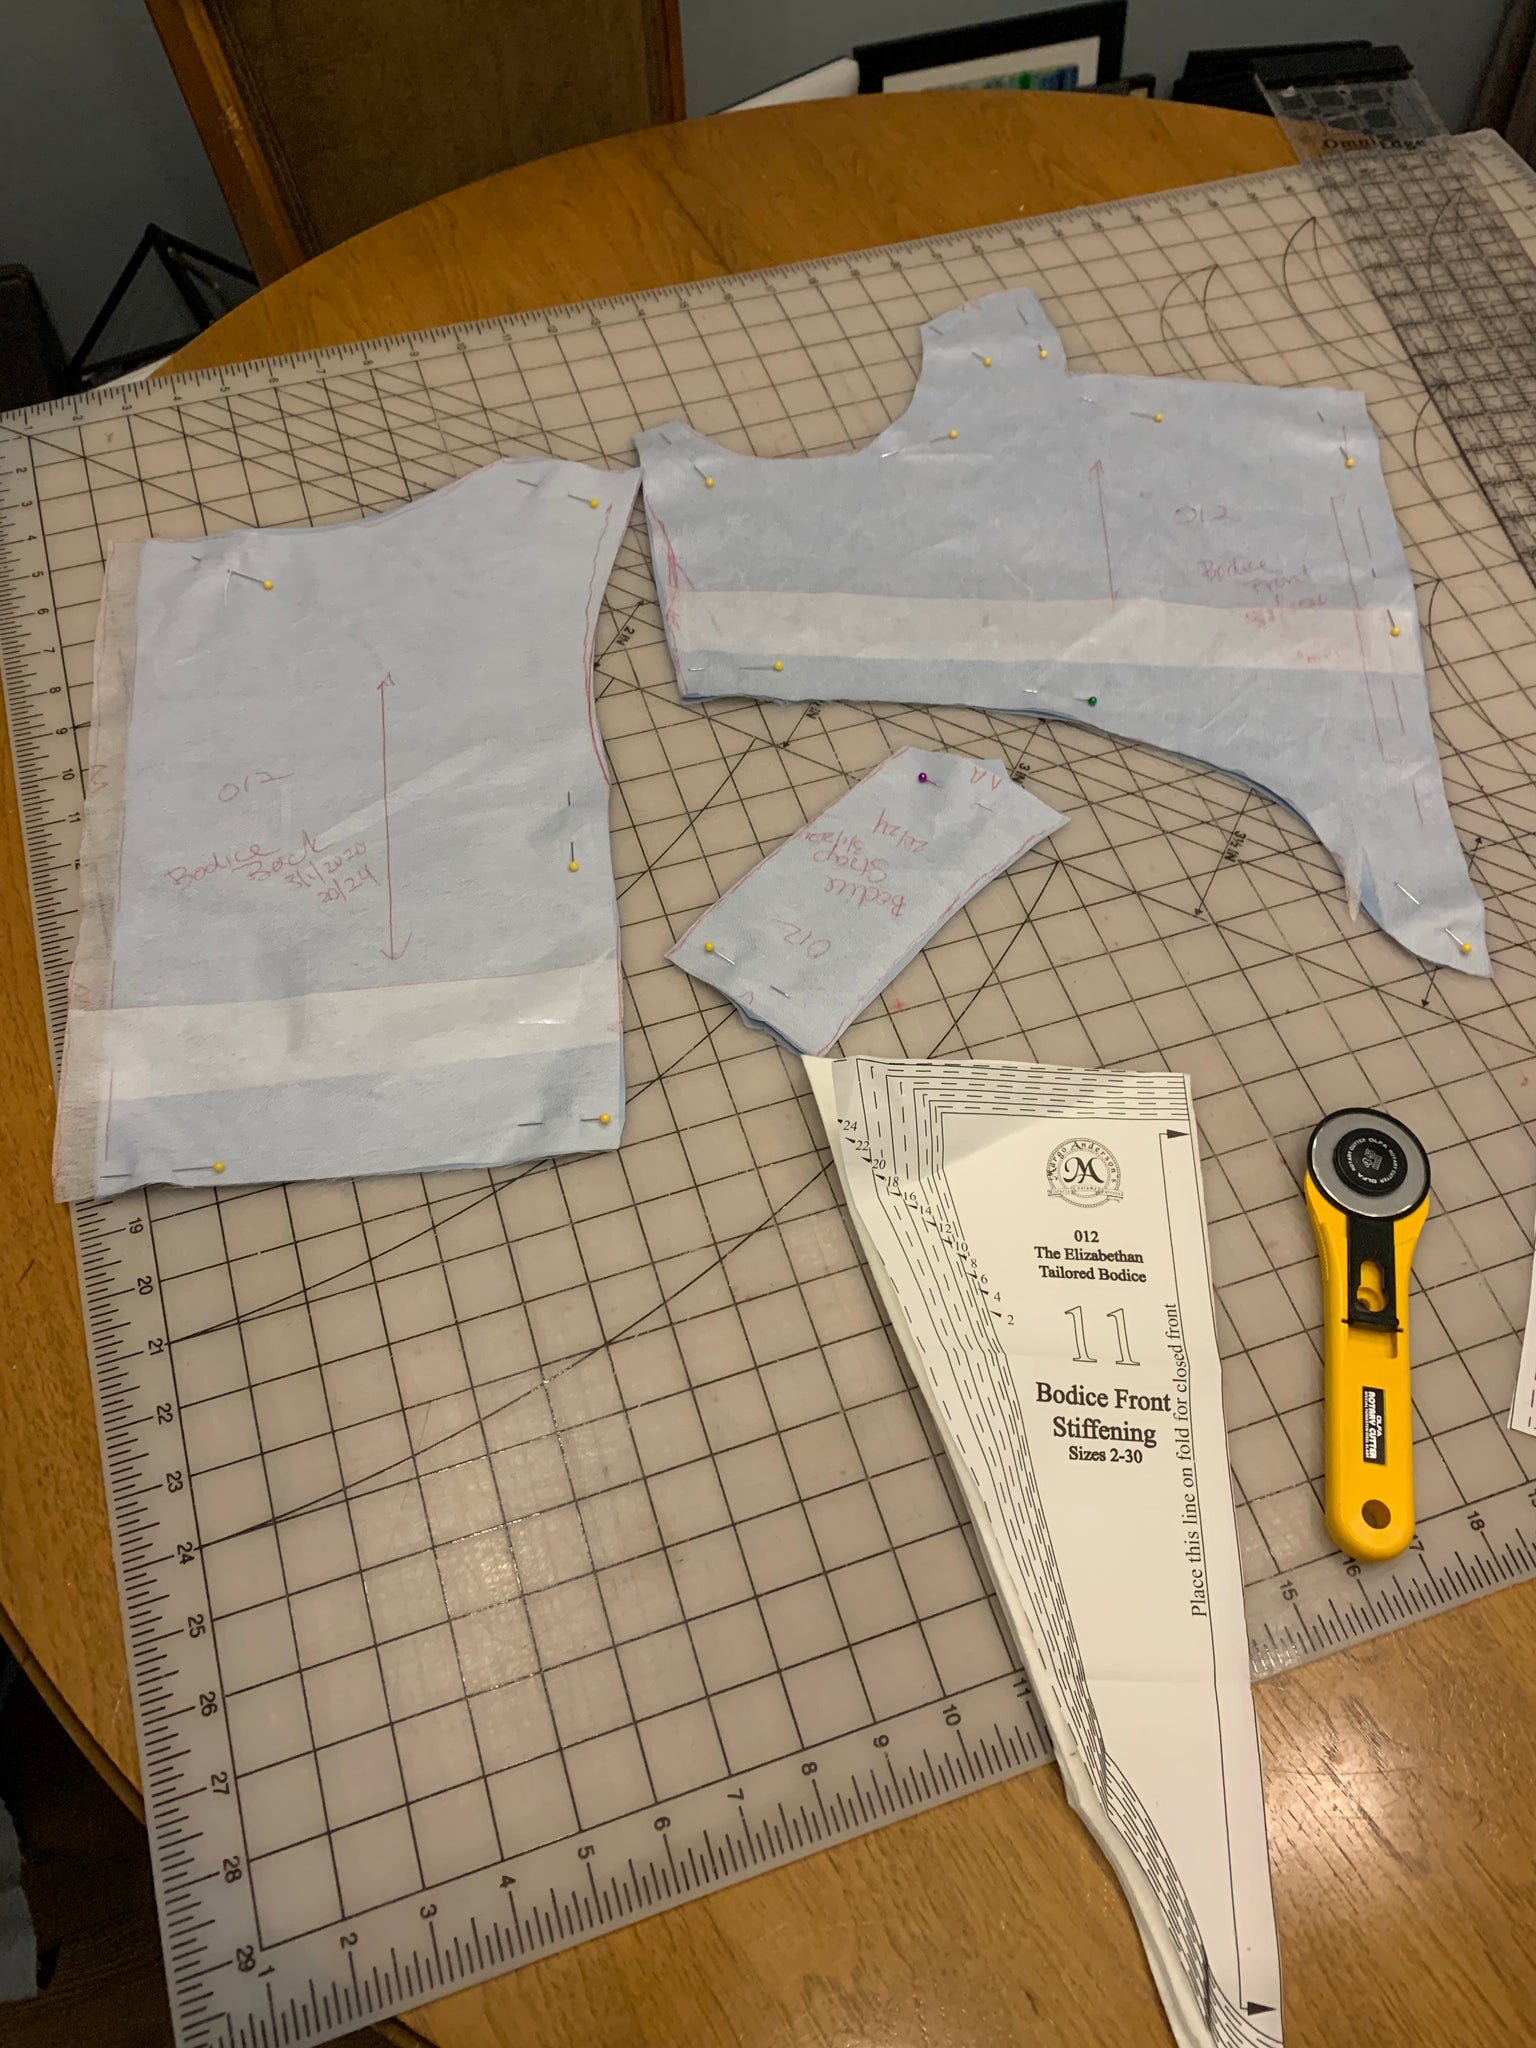
Welcome back to The Elizabethan Bodice Sew Along! Today we will be using our modified and fitted pattern to cut out your flatlining and your fashion fabric! In our last blog post, we fitted the muslin mockup to Gilah, and had to make some adjustments. We snipped the bottom to the natural waist, took it up a bit at the shoulders, and took a dart at each armpit. Transferring the markings from the mockup to the pattern. We took the finished mockup, made the adjustments to it, and transferred those adjustments to our traced pattern. Then the pattern was ready for cutting fabric. Cutting the flatlining fabric. Let's talk a bit about flatlining fabrics. Because we used a fabric that...
Welcome back to The Elizabethan Bodice Sew Along! Today we will be taking the mockup you created in the last blog post, and fit it to your body. Pattern #012 is very versatile, and can be worn with or without a corset. As such, we are going to show the fitting process for both, and how they might look on each person. The first thing you do is lace the bodice on the body being fitted. Pull the shoulder strap over the upper chest, and pin it to the shoulder strap stub on the back bodice. Do this for both sides. FITTING OVER A CORSET. Your bodice may look like this: Front view, over corset. Side view, with corset. Back view,...